This tutorial shows you how to set a JAVA_HOME system variable on Windows 10 latest version.
Step : 1
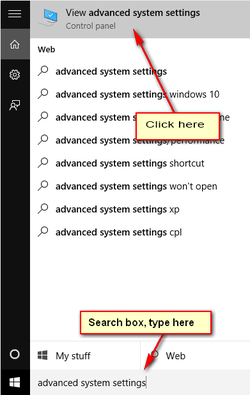
1. Advanced System Settings
Type advanced system settings in the search box in Windows start button, clicks on View advanced system settings.
Step : 1
1. Advanced System Settings
Type advanced system settings in the search box in Windows start button, clicks on View advanced system settings.
Step : 2
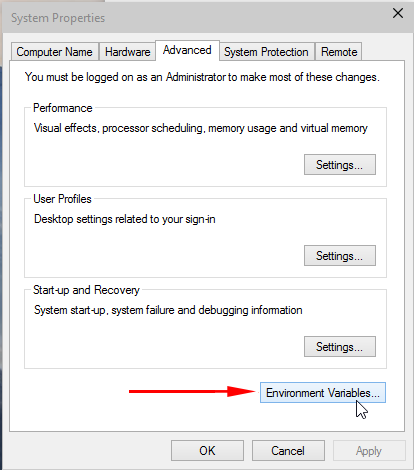
2. Environment Variables
Select Advance tab and hit Environment Variables
2. Environment Variables
Select Advance tab and hit Environment Variables
Step : 3
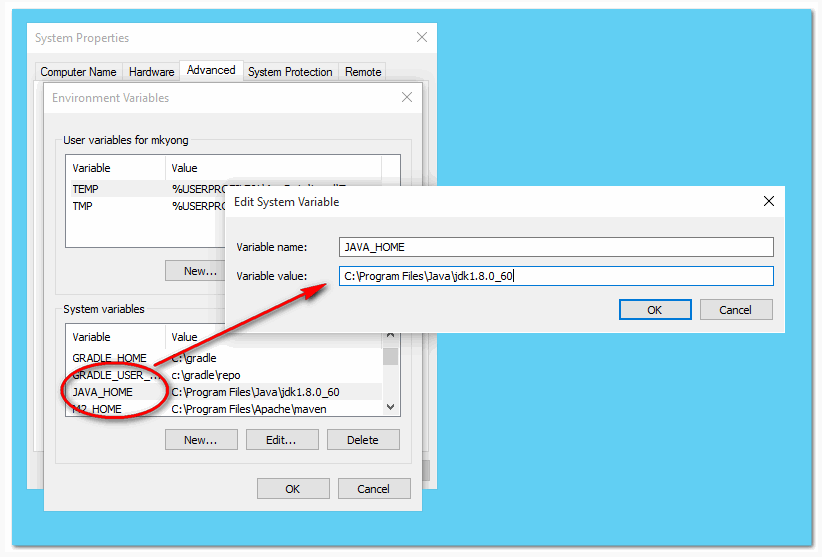
3. Add path in JAVA_HOME
Note
Don’t include the \bin folder, only JDK path.
For example:-
3. Add path in JAVA_HOME
Note
Don’t include the \bin folder, only JDK path.
For example:-
- Correct – C:\Program Files\Java\jdk1.8.0_60
- Wrong – C:\Program Files\Java\jdk1.8.0_60\bin
Step : 4
4. Update PATH
In System variables, find PATH, clicks edit and append this %JAVA_HOME%\bin to the end.
4. Update PATH
In System variables, find PATH, clicks edit and append this %JAVA_HOME%\bin to the end.
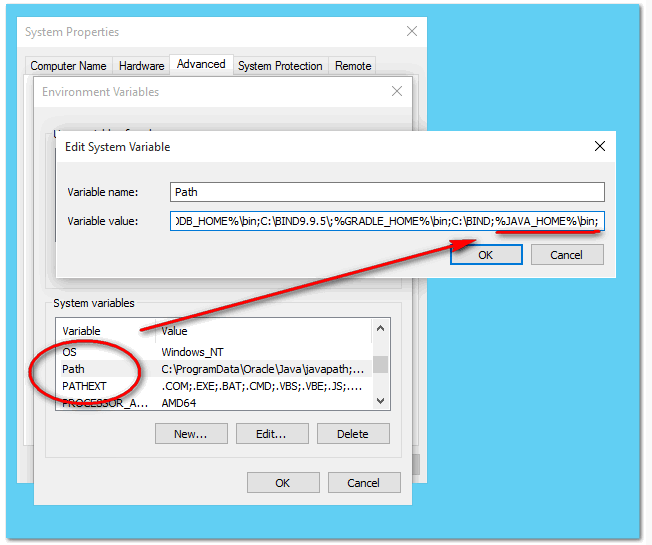
Then Put the JAVA_HOME\bin in PATH make the Java’s commands are accessible from everywhere.
Step : 5
5. Testing
Open your command prompt:
Type.
C:\Users\omsingh>java -version (HIT ENTER)
java version "1.8.0_60"
Java(TM) SE Runtime Environment (build 1.8.0_60-b27)
Java HotSpot(TM) 64-Bit Server VM (build 25.60-b23, mixed mode)
C:\Users\omsingh>javac -version
javac 1.8.0_60
C:\Users\omsingh>echo %JAVA_HOME%
C:\Program Files\Java\jdk1.8.0_60
Done...!!!
 RSS Feed
